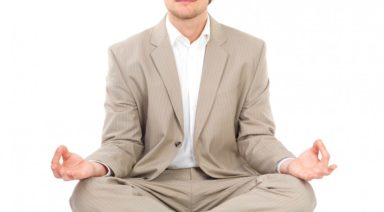
Yoga Nidra

Yoga Nidra is Sanskrit for Yogic Sleep. A powerful technique from the Tantric Yoga tradition, Yoga Nidra creates an altered state of consciousness allowing the practitioner to enter the realm of subconscious and create effective and seemingly magical changes in their life. Yoga Nidra is a part of the Pratyahara limb of Raja Yoga, one of the eight limbs of yoga; the well known codification system of the Yogic practices by Patanjali. Pratyahara deals with the withdrawal of the senses and the influences of the mind which do not serve us on the path of enlightenment.
Yoga Nidra meditation is so inherently powerful that it has been kept secret for nearly 4000 years until the 1960’s when it reintroduced to western students by Parmahansa Stayananda Saraswati.
Most people are familiar with the power of affirmations but many also don’t realize that affirmations can be made infinitely more effective if one is to access the subconscious mind to plant the seed of a new belief. In fact most conscious affirmations methods are ineffective because they don’t manifest in the subconscious.
Under the guidance of an experienced teacher, you will relax your nervous system in the most powerful way available to humans without chemical agents. Once you reach this deepest state of physical and mental relaxation the mind becomes receptive to new concepts. In this manner as we access the subconscious through specifically designed sequences of visualizations you will have an opportunity to implant an affirmation of your choice, which will then manifest in your life.
Before you begin the Yoga Nidra practice formulate your affirmation.
An integral part of the Yoga Nidra practice is the silent repetition at 2 separate time intervals of a sankalpa, a resolve or affirmation. The correct formulation of the resolve is critical to the success of the practice. Because the subconscious mind speaks in it’s own language we must structure the wording of our intent to be accessible and clearly translated by the subconscious.
There are 7 main rules that need to be followed for the outcome to come to fruition:
- The resolve should be stated in a simple language and contained within one sentence.
- It should be made in the first person by using “ I am…” I have…” I create…” “ I feel…”
- It must be structured in positive language. No mention of the negative state should be made, instead the positive desired outcome state should be affirmed. For example, if you desire to attain recovery from a medical condition it should not be structured as “I am not sick” instead a positively stated desired outcome should be utilized such as “I have perfect health” Or “My physical body is in perfect health and balance” etc. No words such as: not, don’t, won’t, can’t, should be used. The statement should be joyous in it’s essence.
- Present tense. Because the subconscious mind is timeless and operating in the moment all affirmations should be stated as if they have already come into being. In this way unlike the petitionary aspect of prayer, we simple affirm that which is already here. Eliminate doubt.
- Affirmations must involve you only. Do not wish change for any specific person. Do not wish for a specific person to change their mind, their condition or their life path to suit your desires. If you are wishing for a partner to manifest in your life, you can describe them but not anyone you know or know of specifically. The practice must respect the free will of all beings.
- When repeating the sankalpa during the practice one should involve all faculties of the imagination and invoke strong emotions to the experience affirmed. Strong emotions create a powerful binding mechanism within our subconscious.
- Patience. Depending on the complexity of the request the manifestation may take linear time to come into full being. Practice yoga Nidra until the desired outcome is achieved.
All of this requires a leap of consciousness and faith to grasp. This is the magical aspect of the practice. Knowing how this works is irrelevant compared to the knowing that it does work.
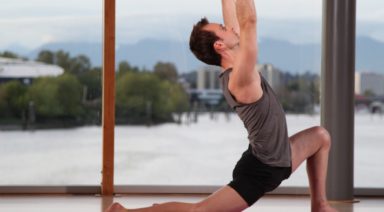
Restorative Yoga Poses that Anyone Can Do

The practice of restorative yoga can be a key component is creating ease and relieving stress in your everyday life, especially if you are recovering from an illness of injury.
As Andrea Marcum, owner of U Studio Yoga studio in Los Angeles says, “We use this [restorative] practice to connect with ourselves, as well as to connect with something greater.” She also suggests that as we relax into the restorative poses, we feel the dust begin to settle in our minds. When the dust settles, the mind becomes unclouded. Like a clear pool of water, which Marcum notes, “clear pools of water reflect the beauty of the surroundings.”
Her A,B,C’s of Breathing are brilliant in their simplicity, a key component of a restorative practice.
Awareness – having knowledge or consciousness Benevolence – kindness – the desire to do well to others Calm – tranquility – free from agitation
I consider this to be the path from the individual to the universal.
Or, more simply, that a restorative state helps us move beyond self-centeredness; from a state of ‘me’ consciousness to a ‘we’ consciousness.
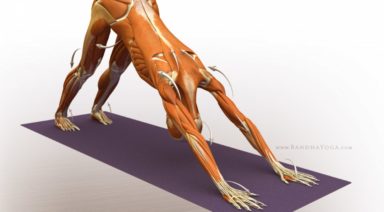
In our typically busy lives, our nervous systems get over-stimulated. It’s as if our bodies are constantly on a cross-country road trip, in overdrive. Like a much-needed rest stop for our nervous systems, try these restorative yoga poses as recommended by Shannon Paige in her Anjali Restorative Chakra Roots to Rise.
To try the following six restorative poses you’ll need a blanket and a bolster.
Remember, you can create a bolster by simply rolling two blankets together. Create a neck roll by folding one of the outstretched blankets in half. The fold will form a large rectangle shape. Take one of the long edges of the rectangle and begin rolling it, about halfway.
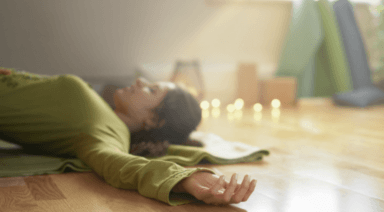
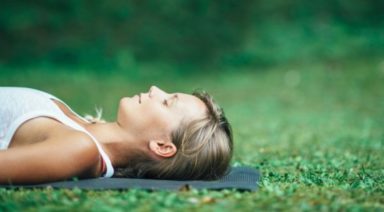
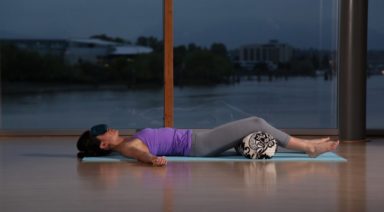
Supported Reclining Pose
Place the blanket at the head end of your yoga mat. The rolled portion will support your neck, and your head can softly rest onto the remaining portion of the unrolled blanket. Adjust the bolster the width of your mat about 2/3 away from the blanket; it’ll go behind your knees to elevate your lower legs. Make sure your knees are wide.
Lay onto your back, ensuring that the bolster and blanket are in comfortable positions. Use your exhales to help you soften into the props and ground beneath you.
To transition out of this pose, bend your knees, bringing your feet onto the bolster. Roll your body onto the right side into a brief fetal position. You can rest your head on your right arm, and keep knees bent. When ready, turn towards the floor with a heavy head to keep softness in your neck, and rise to an upright position.
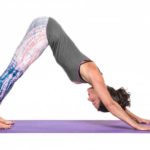
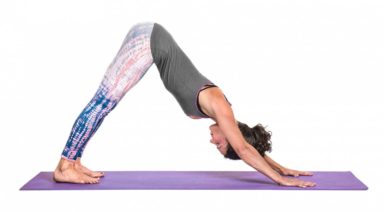
Elevated Caterpillar Pose
From a seated position, with wide legs over the bolster as in previous pose, drape your torso forward. If it feels as though your pelvis is rocking back, you can sit on top of the blanket roll that supported your neck in supported reclining pose. Rest your head on stacked hands or, if accessible, on the bolster between your knees.
To transition out of this pose, bring your hands beneath your shoulders, pads of the fingers press into the floor to lift your rounded torso up. Allow your head to come up last.
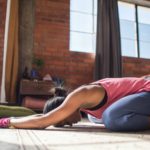
Side Fish
Place the fully rolled up blanket towards the head end of your mat. Move the bolster behind you, the width of mat. From seated, turn towards the right, your right thigh will be parallel to the width of the bolster. Pinwheel your legs so your right foot is in line with your left knee. You can pad your inner left knee if needed. Line up the right side of your torso, so when you lay on to the bolster, the right side of your ribs meet the bolster. Extend your right arm overhead on top of the blanket roll, and wrap the excess blanket roll on top of your arm, so your right arm becomes the middle of a blanket sandwich. Rest your head on this ‘sandwich’ so the blanket equally supports your right shoulder and head. Ensure that there’s ample space for the base of your right ribs and right hip to rest onto the mat. Only the middle portion of the right ribs is elevated onto the bolster.
To transition out of this pose, draw your left arm in front of your body, press down through your left fingertips into the floor to lift your rounded spine up. Keep chin towards your chest as you rise. Turn slightly towards your left, so your seat is on the mat. Bend your knees, feet hips width on the mat, and rest your forehead towards your knees for a few breaths. Then set up for Side Fish to the left.
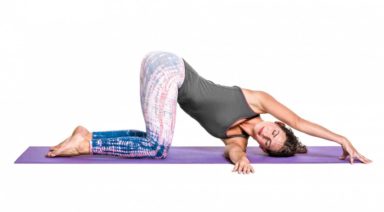
Belly on Bolster Twist
Place the bolster vertical, from head end of mat to middle of the mat. Sit on your left hip (legs in side fish position), with hands either side of the bolster. From your navel, turn your torso towards the bolster and lay down onto it. Your head can rest to either side or you may like to stack your hands and rest your forehead onto them.
To transition, come out the same way you came into it. Before taking the twist to the other side, you may like to recline back onto the bolster, knees bent, feet wide, or simply stay upright for a few breaths. Then take Belly on Bolster Twist to the other (right) side. We typically take twists following the direction of our digestion: from right to left.
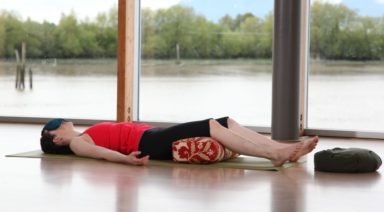
Supported Reclining Butterfly
From an upright-seated position, place the bolster vertical behind you; you may like to elevate the head end with a block, or use a blanket to rest your head onto. Bring the soles of your feet together, and wrap the blanket roll over the tops of your feet, and wrap the ends behind your heels and ankles. You may like to support the outer knees with blocks. Lower your back onto the bolster behind you.
To transition, bring hands to outer knees and draw knees in (blanket will fall away from your feet). Press your thighs away, creating the sensation of spaciousness in your low back. To rise, use your hands on either side of bolster, to lift up.
Supported Child’s Pose
From a seated position, bring the bolster out in front of you, lengthwise. You can place the blanket roll behind the knees for more support (you may want a block under your seat if knees are sensitive), or beneath the tops of the feet. Bring your knees the width of the mat, big toes touching, rest hips on heels and fold forward so your torso rests the length of the bolster.
To transition, roll yourself back upright. Option to take neck stretches: slowly draw right ear towards right shoulder, right arm outstretched. Use your right hand on your right check to lift your head back to center. Then slowly move to the other side.
The Ultimate Stay-cation
We often think that relaxation and de-stressing requires a day at a spa or a month-long Caribbean holiday. Don’t get me wrong, you can sign me up for either of those anytime, but we all need solutions that are cheaper to afford, easier to plan and don’t require a passport. Restorative yoga poses and breathing techniques can be added to your yoga practice anytime, anywhere. Cultivating a consistent restorative yoga practice can have a deep and measurable affect on decreasing stress and anxiety. Just think of it as the ultimate Stay-cation.