The Yoga Pose You’re Doing Wrong (and How to Modify it Safely)
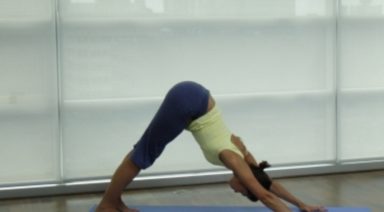
Take any yoga class and it’s almost guaranteed that you’ll do downward facing dog, or adho mukha svanasana, at least once. If you’re a fan of flow classes, the amount of times you’ll find yourself in down dog increases exponentially. For beginners, despite their teacher’s touting down dog as a pose of rest, it feels less like rest and more like a full body workout. This isn’t exactly untrue. When downward facing dog is executed properly the core is engaged and the entire back body is stretching, with the arms bearing some of the body’s weight, making down dog a pose that works the entire body from hands to heels. A correctly executed down dog also has many physical and mental benefits, including building bone density, increasing circulation, developing flexibility, calming the mind and counteracting fatigue. But when done wrong the benefits of the posture may be lost and put the yogi at risk for injury, especially if they’re hitting downward facing dog repeatedly.
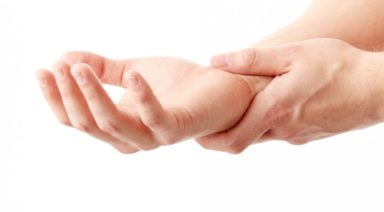
Most of the students I see in class doing down dog incorrectly are making the same mistake. They slump forward into their shoulders, hunching their upper back and misplacing the majority of the weight from their trunk and hips into their shoulders and wrists. The shoulder, a ball and socket joint, is a shallow joint with a complex network of muscle and ligament attachments. This gives the joint a lot of flexibility but also increases the risk of injury, especially dislocation or wear and tear injuries involving the rotator cuff. Shoulder injuries can be extremely painful, and in some cases, can become chronic problems. Because of the complexity of the shoulder’s structure and a modern lifestyle that doesn’t always encourage strong muscle development in the area, shoulder injuries can be hard or impossible to repair, even with surgery. This makes properly practicing poses where the shoulder can be vulnerable, such as down dog, extremely important. Yoga is supposed to make us feel good inside and out, not leave us with chronic pain.
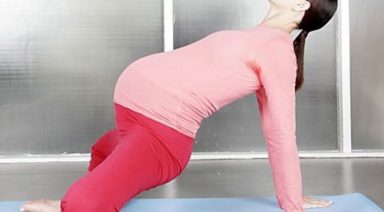
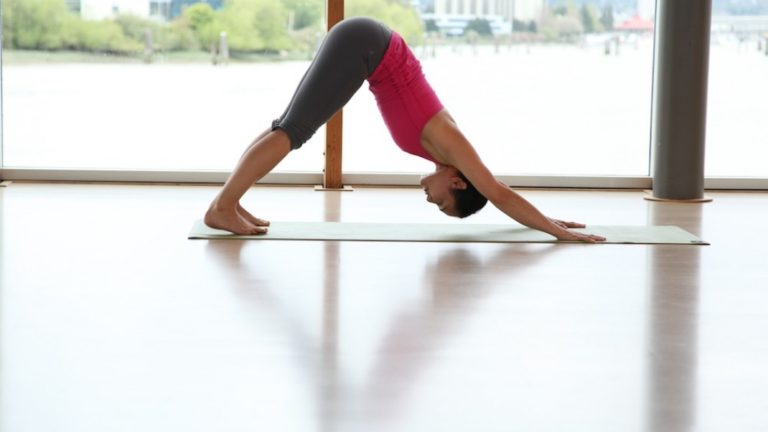
So how do you know if you are doing down dog correctly? First and foremost, listen to your body. If you are feeling discomfort or sensations that don’t resemble the description above, chances are something is off. Are the heels of your hands digging uncomfortably into the ground? Do your shoulders feel heavy and seem to sag toward your ears? Is there little to no feeling of stretch happening throughout your back or hamstrings? Does it feel as though your back is curving upward, like it does during cat pose? These may be signals that you need to make adjustments.
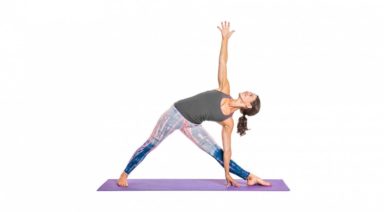
In a proper down dog the base of the pointer and pinky fingers and the heel of the hand should be pressed firmly into the mat. The arms should feel engaged, long, and be externally rotating, with the bony part of the elbows tracking backwards toward the body, rather than facing outwards. The shoulders should be pushing back from the ears with the shoulder blades pressing flat to the ribs. The back body should feel long and flat. The hips should continue this line, so that the entire top half of your body creates a long line from the base of the hands to the tailbone. The legs should feel a stretch through the hamstrings, with the knees straight, but not locked, and the heels pressing toward, or onto, the mat. The feeling should be of the thighs pressing back away from the arms. The lower half of the body is ideally a long line from hip to heel. The entire pose should look like two lines forming an inverted “V”.
Aren’t there exceptions to every rule? Isn’t a yoga practice about showing up and working to your level, rather than striving for the perfect posture all the time? Absolutely. But there is a difference between working on a posture where you are at, and working on a posture unsafely, even if you aren’t striving to put your body into a pose it isn’t ready for. As practitioners, part of being accountable for our practice is seeking guidance when something doesn’t feel right for our bodies. This goes beyond listening to descriptions or corrections given out in class. It means remembering that being pro-active can save us from unnecessary injury or chronic pain. If your down dog doesn’t seem quite right, an experienced teacher can provide you with the guidance to modify it to suit your body and practice while allowing you to safely reap the benefits of the pose.
About the Author
Partner Yoga Poses: The Power of Connectivity
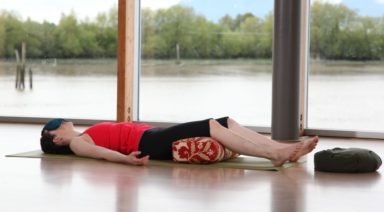
Want to heighten your yoga experience? Deepen your practice through body and mind with partner yoga: Partner Yoga Level One and Partner Yoga Level Two, led by instructor Pedro Franco, are perfect for yoga lovers. Partner yoga is a practice for any level of yogi. It can be done with a friend, loved one or acquaintance. Through this fun and connected series, you will learn to strengthen and amplify your practice by creating a greater sense of awareness in your own body while also paying close attention to the presence and movements of your partner. Partner yoga poses are great if you want to try something new or to spice things up in your relationship with more intimate couples yoga poses.
Things to Keep in Mind When You Start Your Partner Practice
- Partner yoga does not have to be complicated to be beneficial
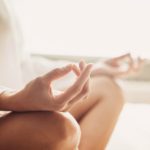
- Partner yoga can simply be sitting back-to-back with your partner and breathing. It can be meditative. It can be as simple as massaging your partner’s sacrum after a stretch or wiggling your partner’s legs after a flying pose
- Partner yoga works on the same principles as individual yoga: Listen to your body and do what feels right. Challenge yourself, but only to a healthy limit
- If you’re new to partner yoga, take time to build strength, stability and flexibility in order to grow in the practice. Remember that in any form of yoga, there is no competition. For as many times as you stumble, you have just as many opportunities to try again. It is the act of connecting that matters most, not reaching a pose
Start with a Simple Partner Yoga Pose
Partner yoga can be a challenge for even the most advanced practitioner: It doesn’t matter how many hours you have spent on your mat, how many downward dogs or side crows you have done in your life. Maybe you are focused and resilient but need to work on your strength. Maybe you are strong and advanced in your movements but need to work on the act of giving yourself to your partner in a selfless manner.
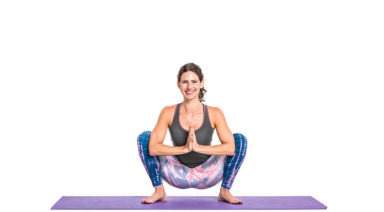
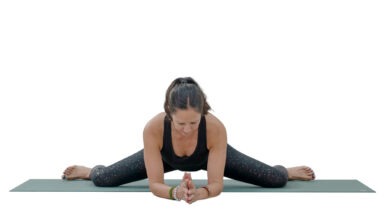
Partner Seated Spinal Twist (Janu Sirsasana)
-
Begin by sitting back-to back in a comfortable cross-legged seated position
-
Each partner places their right hand on the other’s partner’s left thigh just above knee
-
Put your left hand on your own right knee
-
Coordinate your breathing by lengthening through spine on each inhale
-
During each exhale, twist a little more
-
Come back to center seated and repeat on other side
Learn the Art of Balancing with Your Partner
Partner yoga is not just about you. It is about the other person, too. Partner yoga poses exist to teach yogis and anyone interested in the practice how to gain better awareness and alignment of the body through precise adjustments and articulated movements.
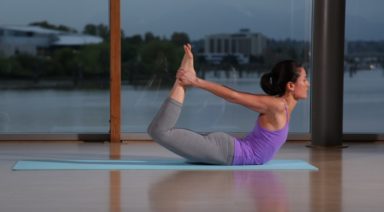
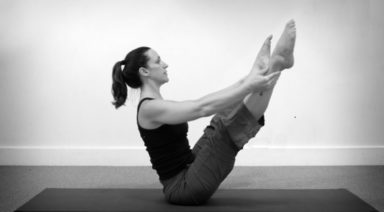
Partner Boat Pose (Navasana)
-
Start by having each partner sit at the end of the mat facing each other
-
Each partner will bend their knees and press the soles of their feet together
-
Connect by clasping each other’s hands
-
While keeping the soles of your feet together, lean back slowly
-
Lengthen your legs and reach your feet upward to a bent-legged boat pose
-
Continue to breathe while you work on your balance
Create Greater Intimacy with Your Partner
Partner yoga can be as intimate as you allow it to be. Partner yoga is for anyone and everyone. It is about trust. It is about connection. It is about feeling the electric sensation between you and another person. It has the power to strengthen bonds between friends, unite strangers and fuse couples together in a new and stimulating way. Partner yoga has the powerful ability to create a profound level of intimacy between two people. The combination of breath, balance, trust and connection create for a unity that is unlike any other. It is assumed by many that partner yoga is purely sexual. This is not true. Yes, partner yoga can be a sensual experience if you want it to be, especially in couples yoga poses. It can also be an experience of unity in a completely different way. It can be whatever you want it to be. That is the beauty of the practice.
Partner Dancer’s Pose (Nataranjasana)
-
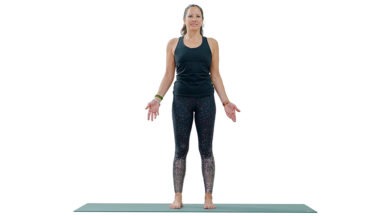
Start by standing up toward the back edge of your mat, facing your partner
-
Grab your partner’s right hand
-
Each partner will slightly bend the knees
-
Shift your weight onto your right leg
-
Bend the left knee and gran onto the inside of the left ankle or calf with your left hand
-
Gently pressing your shin into your left hand, open your back
-
Finally, reach your right arm up to balance
-
Repeat on the other side
Connect with Your Partner
Partner yoga is not just about you. Partner yoga has the word partner in it for a reason. It is a practice for two and is a practice that focuses on the unity of two. This is the idea that we should be incorporating in our partner yoga practice. Listen to your partner’s needs. Are they comfortable? Do they feel supported? Do they feel capable of holding you in a pose? Are they calm and present? Through the power of breath and touch, you will be able to sense your partner’s physical and emotional state. Yes, you need a partner to fly. You need a partner to pull your legs and lift you up. But your partner also needs you. It all comes back to unity. In these partner yoga poses and couples yoga poses, we rely on each other and so we must move in a way that represents that.
Double Standing Forward Bend (Uttanasana)
-
Stand back-to-back with your partner
-
Leave about 6 to 12 inches between you and your partner’s heels
-
Each partner will bend at the waist and come to a forward fold
-
Reach your hands behind you
-
Grab onto your partner’s hands
-
As you increase flexibility, you may be able to grab your partner’s forearms, elbows or even shoulders
-
Walk your heels closer until your bottoms are touching and straighten your legs
-
Lengthen the spine, head dangling toward the ground
Explore AcroYoga
AcroYoga is the combination of yoga, massage and acrobatics. As with partner yoga, which often includes acrobatic poses, shown in the Partner Yoga Level Two video, it is important to focus on the building blocks of your practice. Start with what you know and allow yourself to grow through continual practice, one step at a time. Motivation and repetition are the keys to helping you excel at AcroYoga. A common misconception about AcroYoga is that the size of your partner matters. This is not always true. Believe it or not, you have the ability to lift someone twice your weight. It is all about your technique.
As an extension of partner yoga, AcroYoga relies on the same principles: trust, communication and connection. Once you master these skills, you will be flying in the air and lifting people up with your feet in no time. Here is a fun beginner’s partner AcroYoga pose to test out your skills.
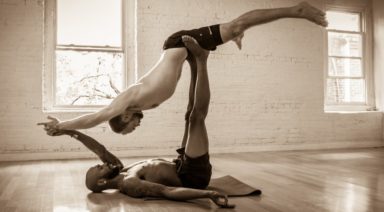
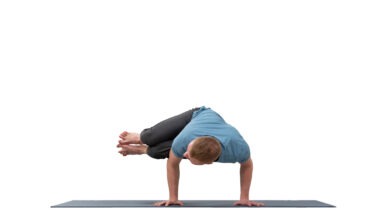
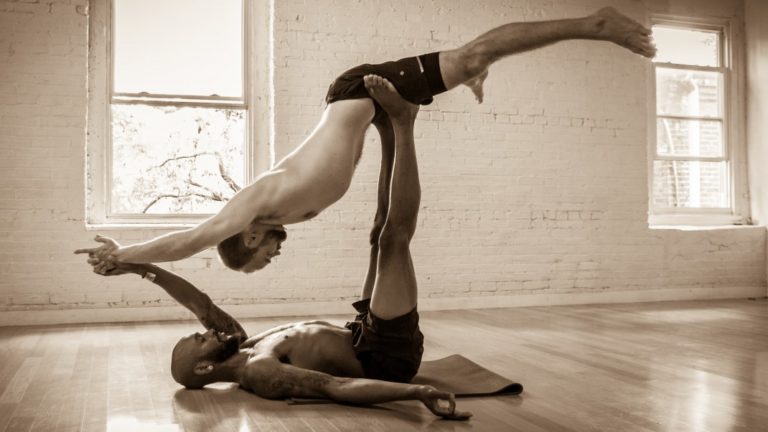
Flying Plank (A)
-
Base lies on back
-
Base places legs up in the air, heels over hips
-
Flyer starts by standing facing the base, with their toes almost touching the base’s glutes
-
Base bents knees slightly to bring feet to the hipbones of the flyer
-
Base and flyer connect hands, palm to palm and fingers interlaced
-
Flyer leans forward into the base’s feet
-
With flyer’s body in a single line, the base will receive the weight of the flyer in their feet
-
Base will then straighten their legs and stack their heels directly over the flyer’s hips
-
The flyer should have an engaged core, and the base should have straight arms and shoulder blades firmly grounded into the mat for maximum support and balance
From Flying Plank, yogis can work into the variation below: the flyer leans into the base’s hands instead of feet.
Flying plank photo credit: Amy Goalen
Just as we protect our family, friends and loved ones, we must protect each other when practicing partner yoga. Emotionally and physically, we must rely on each other to reach the ultimate goal of unity and connection.
Thank you to Amy Goalen for providing the beautiful main article image!