Pigeon | Yoga Pose

ADJUSTMENTS | BENEFITS | CONTRAINDICATIONS | MANTRA | MUDRA | PREP POSES | SANSKRIT | STEPS | TIPS
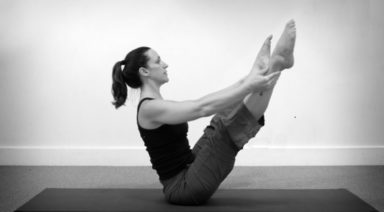
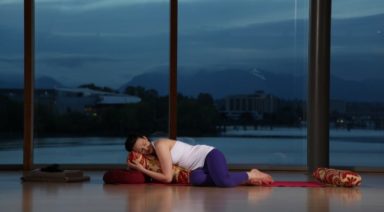
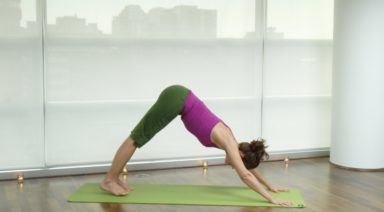
Eka pada rajakapotasana (aa-KAH pah-DAH rah-JAH-cop-poh-TAHS-anna), also known as pigeon or one-legged king pigeon pose, is an intermediate backbend that relieves nerve tension and chronic pain while increasing circulation and helping us control our desires. During this exercise, make sure to maintain a focus on your breathing. We often forget to consciously focus on our breathing, taking full breaths throughout the entire exercise. Pay attention to how pigeon pose affects your breathing.
ADJUSTMENTS/MODIFICATIONS:
- Low Back Pain – If at any point you feel low back pain in the pose, back off, draw in your low belly, and lengthen through your spine to avoid compression. A folded blanket, foam block, or bolster under the bent leg thigh will add support and may relieve the pain. Do not continue in pain.
- Knee Position – The knee is a hinge joint (open-close) and therefore should not be challenged from side to side. In pigeon pose, the weight of the body and the pressure of the floor challenge the knee joint on either side. It is important to keep the ankle in dorsi flexion (toes up), and not flexed inward, to align the shinbone. If you are feeling any tension or pain around the front knee, back off, place the foot closer to the opposite groin, and consider a supportive blanket, block, or bolster under the thigh. Do not continue in pain.
- Progressing to Advanced Versions – To begin bending the back leg, you may use a belt around your foot rather than holding it your hand. Before entering the pose, make a small loop in a strap and place it around the back foot at the area of the ball of the foot. Set up the length of the strap on the floor beside you. Enter the first phase of the pose, and during the second phase, bend the knee and grasp the strap A) with the same-side arm behind you palm up, B) to advance further, turn the palm down, externally rotating the shoulder sending the elbow forward, up, and back, and C) further still, with both hands behind you, elbows forward, up, and back. In each stage, slowly walk the hand(s) back so the tension increases on the strap, always mindful of knee and low back pinching.
CONTRAINDICATIONS AND CAUTIONS:
This pose is an intermediate backbend. You should check with a doctor before performing the pose if you have any of the following conditions:
- Knee injury, meniscus or ligament injury
- Sacroiliac joint injury. The opposing action of the legs in this pose may increase strain across the joint
- History of shoulder dislocation. Do not progress to holding the top of the foot behind the back and use caution reaching behind you for the foot.
TIPS:
This intermediate hip-opening backbend stretches the hips, back, and shoulders. While this can help with relief from discomfort and prevent strain, exercise caution. Go slowly and don’t push your body beyond its limits.
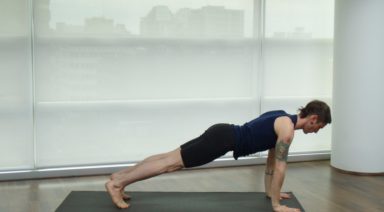
STEP-BY-STEP:
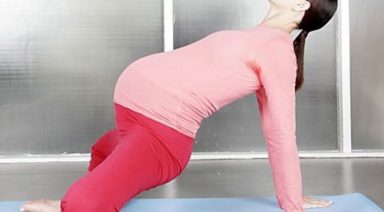
- From your hands and knees, bring your right knee forward to the floor just behind your right hand.
- Outwardly rotate your right thigh so your right foot is in front of your left knee, shin at a 45-degree angle with your thigh on the floor. Strongly flex your right foot to align the ankle and shinbone and prevent the ankle sickling inward. The further away the foot is from your knee, the greater the outward rotation in the hip, and the greater the challenge.
- Curl your left toes under and begin to press the floor away, walking your knee further away behind you until your leg is fully extended with your shin, knee, and thigh in contact with the floor. The right knee may come slightly outside of the line of your pelvis.
- Flex your inner thighs toward each other, squaring the hips, and lifting your pelvis slightly higher.
- Find the middle point where equal weight is between your left and right sides, and your pelvis is squared to the front of your mat.
- If your right hip is off the ground, slide your left leg further back first, keeping your hips square.
- If the right hip continues to be off the ground, use a folded blanket, foam block, or bolster under your right hip for support, keeping the hips square and level.
- Uncurl your left toes, looking back to see that your ankle is in line with your shin and your leg is running in a straight line behind you.
- On an inhale, send your tailbone down toward the earth and the crown of your head up toward the sky.
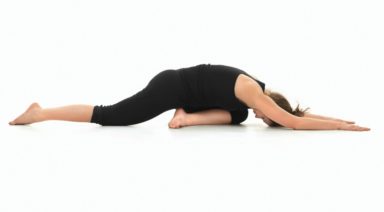
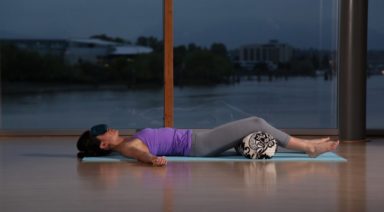
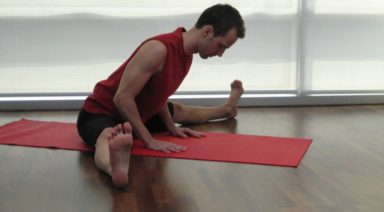
- Exhale and slowly walk your hands forward in front of you, placing elbows on the floor or arms extended in front of you with torso on the floor.
- Breathe slowly for at least five deep breaths.
- Slowly walk your hands back up toward your body, placing your hands slightly wider than shoulder width. Send the head of the arm bones back, allowing your upper chest to lift slightly so the collarbones are broad.
- Inhale, sending your tailbone down and your crown up, walking your hands closer and closer to the body on an exhale so the torso is moving toward an upright posture. Breathe here for five breaths or continue with the advanced pose below.
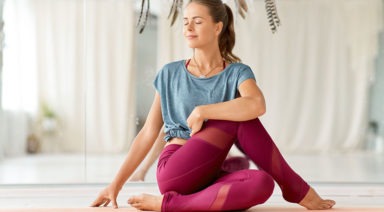
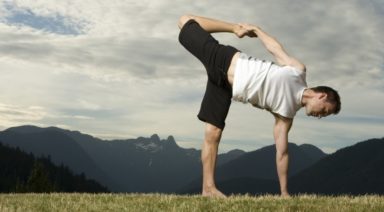
- Advanced A – If you are able to painlessly and evenly stay in this posture while removing your right hand from the earth, you may reach your right arm behind you with the palm up. Draw your lower belly in to stabilize your spine, inner thighs moving toward each other. Bend your right knee and grasp the flexed foot with your hand. You may stay here and breathe or progress to the next stage.
- Advanced B – Point your foot and slowly shift your hand to the toes of the foot by outwardly rotating your arm deeper, slowly lifting the elbow forward, upward, and eventually backward so the palm is facing down. Press your left support hand into the floor to lengthen your waistline, keeping even weight in the left and right sides of the body. Breathe here or progress to the next stage.
- Advanced C – If you are able to maintain your balance and stability, draw the lower belly in, flex your inner thighs toward each other, lift your left arm up and back, grasping your foot with both hands. Send the head of the arm bone back into the socket, keep the action of your lower belly and legs, and breathe.
- Slowly, release your foot, place both palms on the floor and step back to adho mukha svanasana (downward-facing dog).
- Return to your hands and knees, and repeat on the other side.
PREPARATORY POSES:
- Baddha Konasana
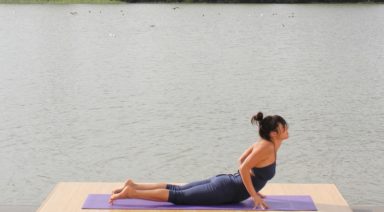
- Bhujangasana
- Gomukhasana
- Setu Bandha
- Supta Virasana
- Supta Baddha Konasana
- Utthita Parsvakonasana
- Utthita Trikonasana
- Virasana
- Vrksasana
FOLLOW-UP POSES:
- Ardha Virasana
- Hanumanasana (Anjaneyasana)
SANSKRIT:
- Eka: one
- Pada: foot
- Raja: king
- Kapota: pigeon, or dove
- Asana: pose
PHYSICAL BENEFITS:
- Opens your hip flexor muscles (psoas, rectus femoris) and your groin muscles
- Opens your hip rotator muscles (gluteus medius and minimus)
- Relieves sciatic nerve tension and eases chronic low back pain
- Increases circulation to urinary, digestive, and reproductive systems
ENERGETIC BENEFITS:
- Traditionally thought to control sexual desire
MANTRA:
“Kali Mantra”
Pigeon pose helps eliminate pain and nervous tension, bringing about a sense of serenity and peace, and calming our disruptive desires. The Kali mantra can be regularly chanted to continue to unlock long-term benefits beyond this exercise.
Kali Raat Ek Nadi Veer
Saat Smudar Ka Jagmag Teer
Kamakhya Rani Ka Gauri Pinda
Bhairavnath Haro Sabh Peera
Shabad Sancha Pind Kancha
Furo Mantra Ishwarovacha
MUDRA: JOINT MUDRA
Incorporate the simple joint mudra into your pigeon pose, as it is believed to be useful in relieving pain and providing energy for longer survival. This mudra is often used for daily meditations and can be done as needed, or four times each day.
How to:
While in your asana, touch your right thumb and ring finger together. Then, do the same on the left hand.
Legal Disclaimer Before participating in any exercise program or using any fitness products or services that may be described and/or made accessible in or through the Gaia Website and/or the Services, you should consult with a physician or other healthcare provider. Read more about Gaia’s Terms Of Use.


About the Author
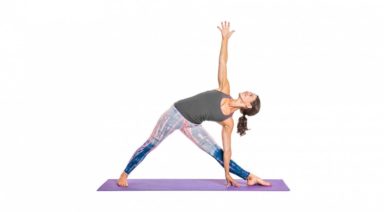
Prasarita Padottanasana: Standing Wide-Legged Forward Bend Pose

ADJUSTMENTS | BENEFITS | SEQUENCING | SANSKRIT | STEPS
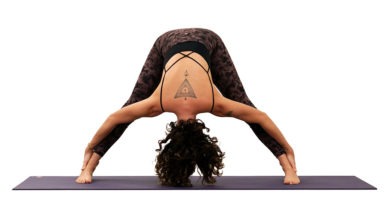
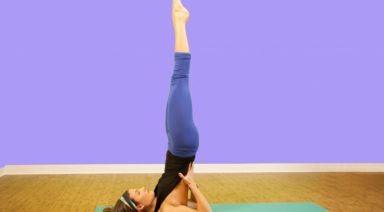
Prasarita padottanasana (pra-sa-REE-tah pah-doh-tahn-AHS-an-uh) is a big stretch for the hamstrings and inner leg line. With many variations available, this pose is accessible for most practitioners. This is also a great pose in lieu of headstand.
Philosophy + Origin
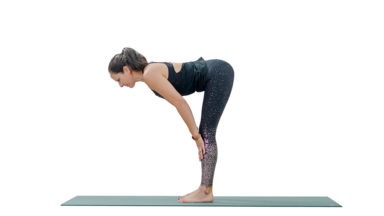
Prasarita padottanasana has found its way into almost every style of yoga. B.K.S. Iyengar taught several variations of this posture, labeling them as A, B, C, and D. The most commonly practiced variation is prasarita padottanasana A. Prasarita padottanasana B is when the hands are on the hips and the head is lifted off the ground, not resting on the mat. Prasarita padottanasana C is the variation where the hands are interlaced and stretched behind the back and over the head as you fold. In the final variation taught by Iyengar, prasarita padottanasana D asks the student to grasp the big toe on each foot.