Can’t sleep? 5 yoga poses to treat your insomnia

Insomnia is pure misery (there’s a reason sleep deprivation is a form of torture). Just sitting in the dark, feeling totally and completely exhausted but unable to fall asleep is like dying of thirst but unable to have a drink. However, if you’re tired of laying there night after night, there IS something you can do about your insomnia! Yoga for insomnia may be able to help you sleep better and sleep more deeply.
It should be noted that the causes of insomnia are complicated, and yoga isn’t going to be a cure-all for everyone who tries it. However, there are success stories; if you are desperate, it’s worth giving anything a try (especially something as healthy as yoga) in order to finally get a good night’s rest.
If you’re new to yoga, it might be in your best interest to try out a few classes and get some pointers before going it alone. These are definitely beginner’s poses, but making sure your body is properly aligned is the essential part of yoga, and you also don’t want to hurt yourself.
If you want to see the poses in action, click on the name of the pose!
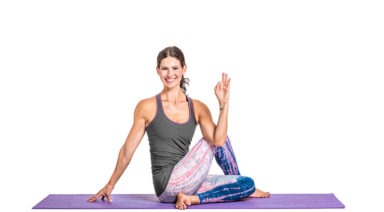
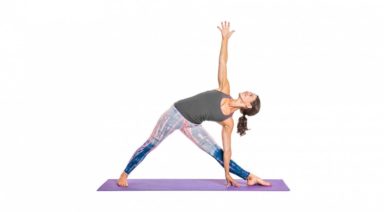
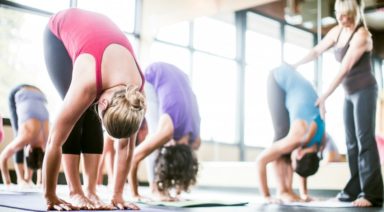
1. Seated Forward Bend
How It Works: seeking calm and restoration? This is the pose for you. It also can help improve digestion. If digestive issues are keeping you up or waking you at night, this can help, big time.
How to Practice: Sit on the floor with your legs straight out in front of you, focusing on sitting up as straight as possible. Inhale, and raise your arms over your head, flexing your feet as you dive forward. Grab on to your feet, ankles, calves, or thighs. Don’t worry about how far you go. When you feel a gentle stretch in the backs of your legs, you’ve gone far enough to get the benefits of this pose. Keep your back as straight as you can, and stay here for 10-12 slow breaths.
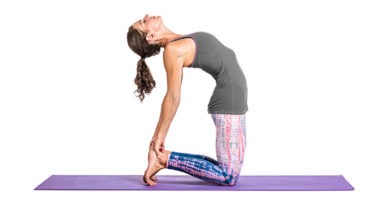
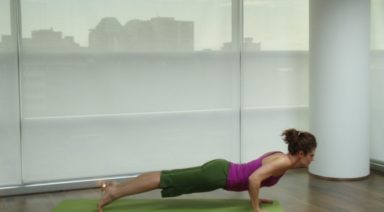
2. Bridge Pose
How It Works: a back bend to help you sleep? It might not sound particularly relaxing, but it can actually help you calm down and prepare for sleep. Inversions like bridge pose alleviate stress, which is one of the major factors that can contribute to insomnia. Let’s face it, it’s your mind, not your body, keeping you up.
How to Practice: Start by lying on your back, then bend your knees, drawing your feet in, so that they’re flat on the floor right by your bottom. On your next inhale, press down with your feet and your arms to raise your bottom off of the floor. Use your inner thigh muscles to keep your legs from falling out to the sides, and clasp your hands together. Squeeze your shoulder blades together gently, and breathe in this posture for 10-15 slow breaths, then slowly release your back onto the floor.
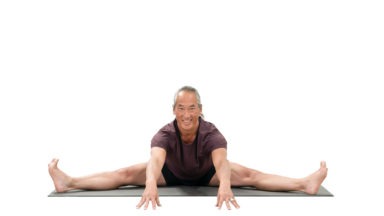
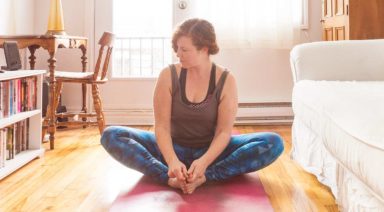
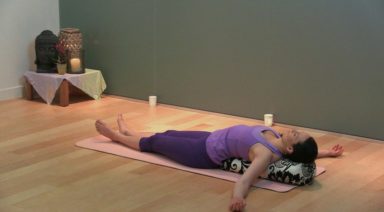
3. Reclining Bound Angle Pose
How It Works: this is a relaxation pose that stretches your legs and reduces stress to help you sleep better and more deeply. It’s especially beneficial if racing thoughts or a restless body are keeping you awake.
How to Practice: Start in a seated position, with your feet touching each other. Lean back, so one elbow is on the floor, then lower yourself down so that your back is resting on the floor, and focus on rolling your shoulders back and pulling your shoulder blades together. Your arms should be in a neutral position, palms up, like in the photo. Close your eyes and breathe, staying in this posture for as long as you like. You can use a blanket or bolster to support your feet, like in the photo above, if necessary. You can also tuck pillows or folded blankets under your knees or thighs, if you feel like you need more support there.
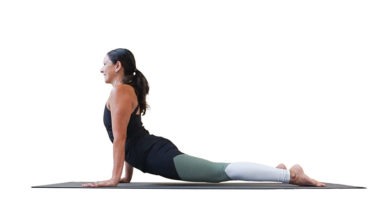
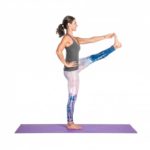
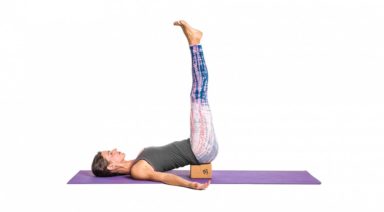
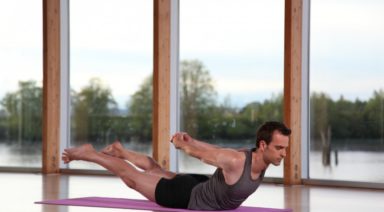
4. Shoulder Stand
How It Works: a basic inversion like shoulder stand helps you slow down and relax. This posture calms the mind and relieves leg and foot soreness that might be robbing you of sleep.
How to Practice: Begin by lying on your back, then bring your knees into your chest. Place your arms flat on the floor, so that your hands extend past your bottom, palms on the floor. Push with your arms, and curl your spine to bring your legs straight up into the air. Bend your elbows, and place your hands on your lower back to support yourself in this posture. If you find shoulder stand too intense, try Legs Up the Wall instead. It’s a simpler variation with many of the same benefits.
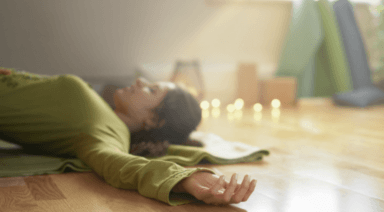
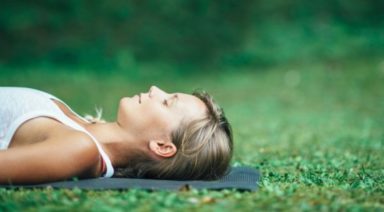
5. Savasana
How It Works: This pose may not seem like much, but the practice of lying still and letting your body soak in the poses you just practiced helps prepare your brain for rest and relaxation.
How to Practice: Lie on your back with your feet shoulder-width apart and your arms in a neutral palms-up position by your sides. Close your eyes, and focus on your breath. Notice how your belly gently rises and falls as you inhale and exhale. There are quite a few technique that you can use while you’re in this pose. You can just focus on your breath, listen to soothing music, or choose a guided meditation to listen to.
Want more? Try our other yoga routines for sleep or these Ayurvedic tips for good sleep.
About the Author

Yoga for Insomnia

Not getting enough sleep or waking up in the middle of the night is the worst, except maybe not being able to get to sleep in the first place. Tossing and turning when all you want to do is catch some much needed zzzzzzzs is miserable. Lack of sleep can also increase risk of illness and decrease productivity. Roughly 60 million Americans are affected by chronic sleeplessness; women and people over the age of 65 are disproportionately impacted by this disorder.
There are a million reasons sleep can be elusive. Perhaps you have too much on your mind or maybe you are already anxious about everything you need to accomplish the next day. You also could be dealing with a more serious condition like insomnia. For a chronic problem, see your physician, but there are also some simple things you can do to combat occasional sleeplessness.
Insomnia runs in my family. If I have learned anything from my family members, it is that sleeplessness is more about getting your mind right and adjusting your daily habits and less about knocking yourself out with medication.
Why Yoga for Sleep?
According to Science Daily, “sometimes called the rest and digest system, the parasympathetic system conserves energy as it slows the heart rate, increases intestinal and gland activity, and relaxes sphincter muscles in the gastrointestinal tract”. The parasympathetic nervous system (PNS) is responsible for involuntary movement, which means you don’t always know when it is working and when it is struggling to keep up or is blocked. The PNS controls crying, salivation, urination, and digestion and works when it is at rest. Insomnia can dramatically decrease your PNS’s ability to function at full capacity.
Fortunately, the benefits of yoga, such as lowered stress, reduced blood pressure and better circulation, increase the activation of the PNS leading to better mental relaxation and better sleep.
One technique you may consider for preventing those sleepless nights is a regular yoga practice, especially gentle yoga in the evening. This is probably different from the yoga you practice in a studio. It is similar to restorative yoga in that it concentrates on low tension positions. Think of it more as stretching with a focus on your breath and calming your mind. If you find a few positions you really like, add them into your bedtime routine.
Relaxation is crucial to combatting insomnia. By focusing on your body, you are less likely to let your brain takeover and more likely to put aside the daily stressors to prepare for bedtime. In addition, yoga helps slow your breath, which should leave you feeling more calm. A few poses that are ideal for this include:
Child’s Pose – Balasana
Benefits
A common resting pose to regain control of your breath after a round of more challenging postures or movements, this position has virtues of its own when performed in isolation. It opens your hips, allows for better circulation, and most importantly, helps relax your mind.
Give it a Try
Begin in tabletop pose with your hands and knees on your mat. Your hands should be firmly below your shoulders and your knees below your hips. Next, sit back on your heels and spread your knees to the edges of your mat. While gently lowering your forehead to your mat, reach your hands at the top of your mat. Stay this way for several minutes. Focus on your breath. Breath in and out slowly. Concentrate on every inhale and exhale.
After a few minutes, spread you knees wider, which should sink your head lower into your mat. Stretch your arms farther up your mat and shift your focus to your fingertips. Fan out your fingers and press them into the mat. Remain here for several more minutes, then slowly lift your head and open your eyes. If that felt good, repeat two to three times before climbing into bed.
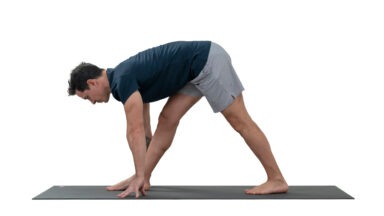
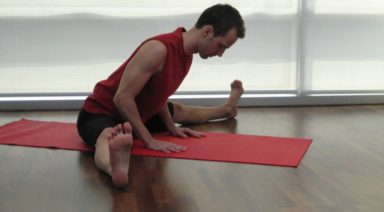
Supine Spinal Twist – Supta Matsyendrasana
Benefits
Opens your chest and stretches out your leg muscles. Alleviates pain in your lower back. Persistent back pain can often keep you tossing and turning at night.
Give it a Try
You can do this on a mat, soft carpet, or even in bed. Being by lying down on your back with your arms out to the sides, so that your body is in a “T” shape. As you inhale, lift your heels off the ground. Exhale and lower your heels back down, turning your knees to the left side of your body. Keep your knees stacked on top of each other.
Continue to focus on your breath, while turning your head to the right. Allow your right shoulder to press deeper into the mat maintaining the twist through the upper spine. Gently place one hand on top of your knees to deepen the stretch. Hold for at least 20 seconds, but feel free to stay in this position as long as you like, then repeat the stretch on the other side.
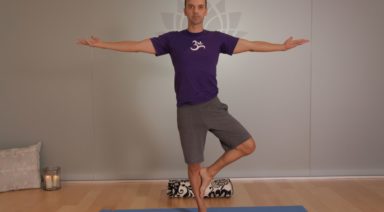
Legs Up The Wall Pose – Viparita Karani
Benefits
Lessens menstrual cramps and headaches, relives lower back pain and stress, and reduces the weight off the body which will help ease you into sleep.
Give it a Try
This position requires some set-up. First, grab two large blankets and a small towel/eye mask to put over your eyes. Fold one blanket in half and place it on top of your mat. Both your mat and the folded blanket should be along a wall so that your entire back will fit on top. Then, fold a second blanket thicker than the first and place to the side.
Lie on top of the first blanket with your seat against the wall and legs going up the wall. Place the folded blanket under your seat so that it elevates your seat and keeps your back on the ground. Your body should be in an “L” shape with the floor and the wall, if there is any space, gently shimmy your body forward so that you are making full contact with the wall.
Once your body is positioned, place the small towel/eye mask over your eyes and rest your arms along your sides. Allow your mind to empty. Focus on your breath and enjoy the sensations in your legs, as you stay in this position for about five minutes.
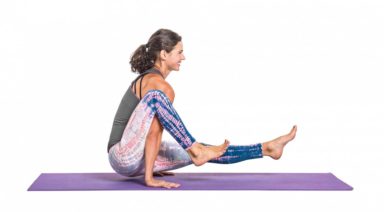
Cat-Cows – Chakravakasana
Benefits
This is a great position before bedtime if you spend most of your day sitting. Quickly builds heat and sheds extra energy to help you ease into sleep.
Give it a Try
Begin in tabletop position (same as Child’s Pose). Make sure your wrists are right under your shoulders and knees under your hips. Let go of any tension in your back and allow your spine to retain a neutral position.
Curl your toes under and tilt your pelvis back. Your seat should be raised, your back in a “U” shape and your gauze should be forward and slightly up towards the ceiling. You are now in the cow pose. Hold for a long exhale.
To transition into the cat pose, uncurl your feet so that your soles are facing up. Tip your pelvis forward and tuck your tailbone. Move your gauze down to your mat, allowing your head to follow and your spine to form an inverted “U.” Pull your navel into your spine and hold. Hold for a long inhale.
Inhale and exhale for several rounds. Remember to form a cat pose on inhale and a cow pose to exhale. Do this for at least three minutes, then rest in child’s pose. If you are still feeling restless, do two or three more rounds just like the first.
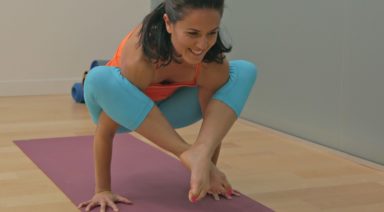
Happy Baby – Ananda Balasana
Benefits
Lubricates your joints, calms the mind, and releases tensions in the body.
Give it a Try
This is an easy, fun one. First, lie on your back on top of your mat. Hug your knees into your chest. Take 10-15 seconds in the pose to warm-up your body. Then, grab the soles of your feet (or ankles if grabbing your feet is impossible or uncomfortable). Using your hands, pull your legs apart and to the sides and hold the stretch for another 10-15 seconds. If it feels good, gently rock from left to right. Allow your head and shoulders to press deeper into the mat. Lastly, let go of your feet and return to hugging your knees. Repeat this exercise as many times as desired.
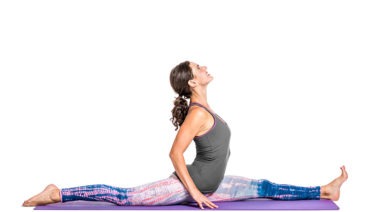
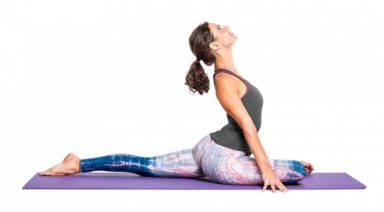
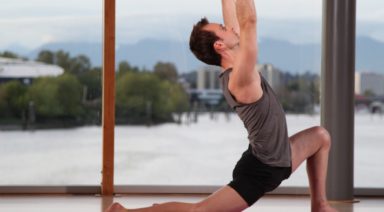
Pigeon Pose – Kapotasana
Benefits
Relieves tension in the chest and shoulders. Also, helps to relieve stress and anxiety.
Give it a Try
Begin the same way as Child’s Pose or Cat-Cows exercise – in tabletop pose with your hands and knees on your mat. Bring your right knee as far forward as it will go comfortably and slide slightly to the right of your body. Your toes should naturally tuck under your seat.
Shifting your focus to your left leg, slide your left leg as far back as possible. Make sure the soles of your feet face upwards. Place your hands on either side of your legs.
Then on exhale, extend your arms forward to the top of your mat, lay your torso down over your right leg, and lower your forehead onto your mat. Stay here for ten breaths. Then, deepen your stretch as much as possible by sinking into your hips and stay for another ten breaths.
Next Steps
You don’t have to resort to expensive, potential harmful prescription drugs to get a good night’s sleep. In addition to the pre-bedtime yoga positions suggested above, there are Ayurvedic sleep remedies and other natural techniques you can use to help you drift off to sleep and stay asleep, including:
- Routine. Routine. Routine. I can’t stress this enough. The simple act of doing your bedtime rituals in the same order can help remind your brain it is time to sleep. Make a list of what you typically do before bed and stick to it as much as possible.
- Your Bedroom. Is your sleeping space conducive to sleeping? If there are any lingering signs of work, get it out of there! Your bedroom should be exclusively used for two things. (I’ll let you read in between the lines on that one.)
- Relaxing Music can help you wind down. You want music that doesn’t have lyrics and won’t keep your mind racing.
- Scents can change your mood. I swear by an aromatherapy scent that I use before bedtime or anytime I am stressed. I have it in lotion, candles, and pillow spray.
- Write it down. Keeping a pen and paper on your nightstand can be an easy way to add things to your to-do and get them off your mind.
- More Yoga. There are other types of yoga that can be beneficial, including Kundalini Yoga and Yoga Nidra.
Yoga Nidra is one of my favorite things in the world. In fact, I treat myself to it for my birthday every year. It is essentially a yoga nap which will have you drifting off to sleep in no time.