Therapeutic Yoga: A Journey From Pain to Presence
Many of us turn to yoga as a means of coping with the inevitable pain and suffering of life. Therapeutic yoga, which generally incorporates gentle and restorative yoga, breathing, and meditation, is an excellent tool for healing. Included are a few practices that are not typically considered therapeutic because as the journey of healing is diverse, so should the practices be. Different yoga practices are agents of healing at different points along the healing journey. Enjoy these ten therapeutic yoga practices at home alone or with a trusted yoga professional. Notice how they make you feel so you have the context to decide when to practice them in the future.
A Need to Slow Down
Vinyasa and power yoga are dominating the yoga industry and are not typically accommodating to people with injuries. Power flow is not appropriate when what you need is to slow down and heal. As a result, yogi’s are searching for something gentler and more accessible. On my own healing journey and as a yoga instructor, I have found the following practices to be appropriate at different stages of healing. Use them as you see fit in your life of healing, growth, and self-evolution.
Therapeutic Yoga Practices For Healing
We can all relate to the deep pain of loss. Often when we are reeling from a sudden trauma, our bodies stop us from doing much of anything. I call that period the pause. If you are inhabiting the pause now, the next two practices are perfect for you. And regardless of whether you are trying to heal anything, the following practices will lead you to live a gentler, more peaceful life.
Meditate on Comfort
This practice is a powerful agent to shift perception. Use this meditation to change focus from pain to pleasure. Appropriate for people dealing with chronic or acute physical pain, or a sudden trauma. Empower your mind to focus on what feels good, even if it’s the tiniest glimmer of pleasure:
- Sit or lie down ‘comfortably’
- Notice your natural breath
- Relax the face, shoulders and brain
- Start to notice the physical sensations of the body
- Notice any pain or tension
- Acknowledge and accept the difficult sensations
- Then scan for comfort or pleasure (even if its just one pinky toe)
- Focus on where you feel pleasure
- When you start noticing pain again, shift your focus to where you feel pleasure
Yoga Nidra
Yoga Nidra is a deep relaxation that translates to “Yoga sleep,” meant to align the subconscious and conscious mind, allowing practitioners to behave more like their authentic self. By deeply relaxing and accessing the heart’s truest desire, yogis can then walk in alignment with their heart in thought, word, and deed. Try this practice when you are suffering and also when you are well:
- Purchase, stream, or attend a nidra class
- Lay down and listen
- Become aware of every cell in the body
- Learn your heart’s desire from a relaxed state
- Set your Sankalpa/Resolution
- “Wake up” feeling deeply relaxed
- Repeat regularly
Yoga Poses for Bodies Recovering from Physical Injury
Child’s Pose on a Bolster with a Heated Herb Pad on the Sacrum
This pose will melt away stress; lengthen the spine safely for almost anybody, even if you have disc injuries. As with all forward folds, this pose is calming on a physiological level.
In this pose, your spread knees apart on a yoga blanket. The bolster, which is a supportive pillow, holds up the head and chest, keeping the back level, rendering it safe for most disc injuries. The warm herb pillow makes your spine happy as you breathe and relax.
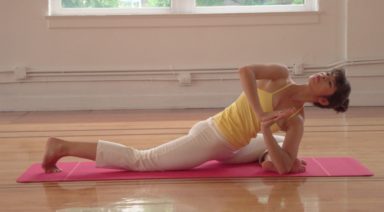
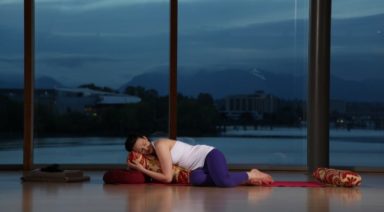
Prone Spinal Twist with Bolster
This posture is safe for almost anyone. This pose combats the discomfort of sitting too much. It loosens up the hips and oblique muscles and opens the chest. It allows practitioners to slow down, which is where much of the magic happens.
In this posture, use a bolster lengthwise on the mat. Lay the chest onto the bolster and allow the hips to be on the mat below. Ensure that both knees and the face are looking in the same direction. Add a folded yoga blanket between the legs to protect the knees and ankles. Aim to take about 10-30 breaths, slowly letting the chest turn more and more toward the bolster. Drift deeply into relaxation before repeating on the second side. Make sure to transition from one side to the other gently and to remain in the pose on the second side for just as long as the first side.
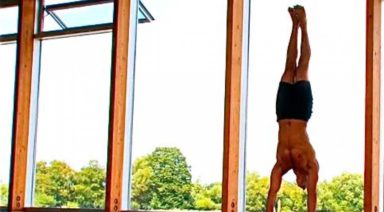
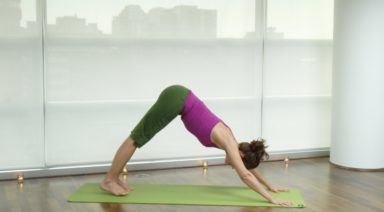
Downward Dog on the Wall
This pose is safe for people with (most) shoulder injuries, pregnant bodies (although most pregnant bodies CAN do a typical downward dog) and for people who can not do weight bearing with the shoulders, to access the therapeutic benefits of spinal lengthening, blood circulation, and the alignment associated with downward dog.
This pose looks like the letter L turned upside down. Hinge your body at a 90° angle at the hips, arms extended. Place your palms and spreading fingers on the wall at shoulder width distance, your wrists and hips at hip height. You know your feet are far enough from the wall when they are flat on the floor facing the wall and, your hands flush with the wall, arms and spine extended. Be sure to bend your knees slightly and draw your tailbone backwards to lengthen the spine and protect the hamstrings.
First and Second Chakra Healing
These next two practices are for people already actively healing, who are safe to do light exercise. Often times trauma brings up issues in the first two chakras. If you have recently moved, experienced a loss or change of roles/career, or if you had a near-death incident, you may be facing first chakra issues. If you have had a failed pregnancy, difficulty becoming or staying pregnant, or other issues of procreation and personal creative expression, you may be facing first and second chakra issues. Let’s look at therapeutic yoga from a 1st and 2nd chakra approach.
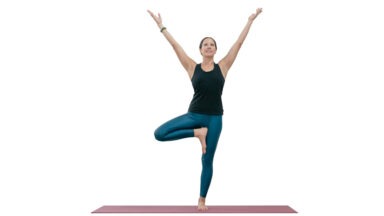
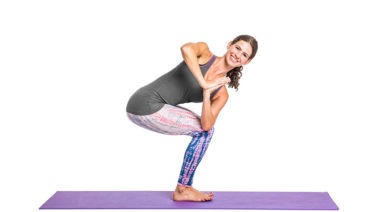
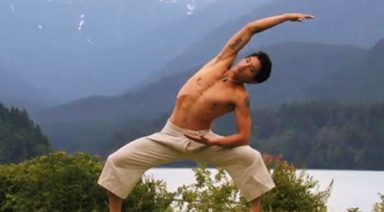
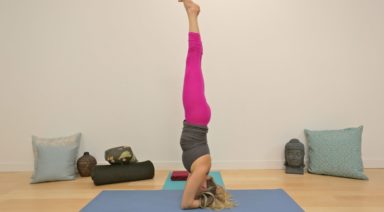
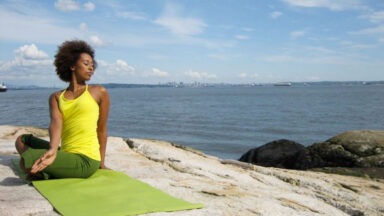
First Chakra Treatment: Mountain Pose
This pose is grounding, aligning, supported and intentionally pausing. Stand up tall, head over hips, over tailbone, over heels. Move the tailbone down toward the feet and the belly button gently back toward the spine. Open the chest broadly, spreading the collarbones and slightly tucking the chin. Neck long at all sides. Palms in prayer at the center of the heart. Breathe, pause, notice, and become grounded. Feel the physical support of the earth and let it hold you up. Be held. Pause. Repeat the Mantra.
Mantra “I am.” Or “I am held.”
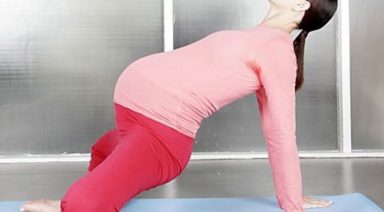
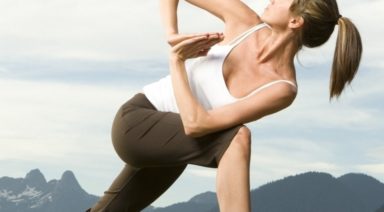
Second Chakra Treatment: Cat/Cow
Use cat/cow when your spine and belly organs are healthy for movement. Move the body with a water-like grace. Regain command of your creative, procreative, and personal expression.
On hands and knees, with knees padded by a blanket, undulate the spine from cow pose to cat pose. In cow, breathe in. Broaden collarbones and raise the tailbone. Open the eyes brightly and think or say the mantra, “I create.” Breathe out. From the tailbone, roll the spine like a C-shape to raise the thoracic spine toward the sky and the chin and tailbone toward the earth. Close the eyes and turn the focus inward.
Think or say, “I love all dimensions of myself.”
Therapeutic Yoga To Get You Moving Again
After a trauma, and the pause, you need to be discerning to determine when to get moving and grooving again. If you are healing from medical issues, it may be appropriate to ask your physician. When your body and spirit are ready for active healing, your intuition will sense that it’s time to get moving. Listen to your inner voice of wisdom! To bring energy back into your life, try the following two yoga practices. They are a perfect compliment to one another like yin and yang.
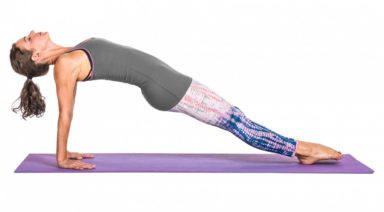
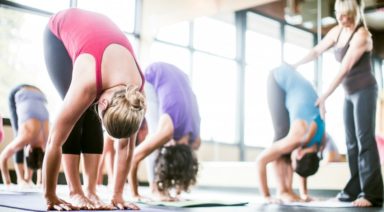
Sun Salutations
Sun salutations bring the energetic quality of the sun into your body. Warmth, growth, energy, lightness, upliftedness.
- Inhale to mountain pose
- Exhale to forward fold
- Inhale to flat back
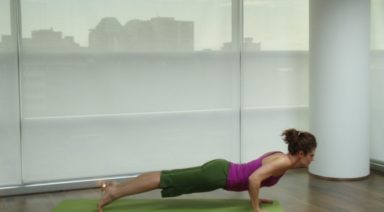
- Exhale to plank and lower knees, chest and chin
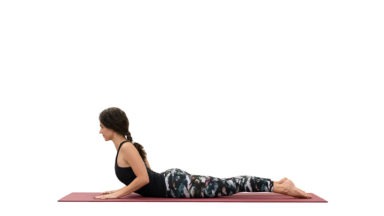
- Inhale to cobra
- Exhale to downward down
- Repeat several times in the morning to bring the sunny side of life back to a healing soul
Moon Salutations
Moon salutations bring the cooling, divine feminine, dark-side and circular energy. A complement to sun salutations, done as a flow that circles from the first to last pose in a mandala or a round fluid flow. Go as quickly or slowly as your body wants you to.
- Inhale mountain pose with arms over head
- Exhale c-curve the spine to the left
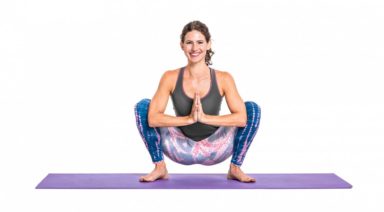
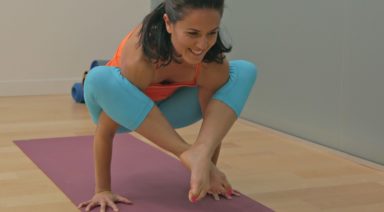
- Inhale goddess pose – Feet wide, toes out, knees over ankles, and arms like a goal post
- Exhale star pose (a transition pose arms extend at shoulders, legs both long feet forward
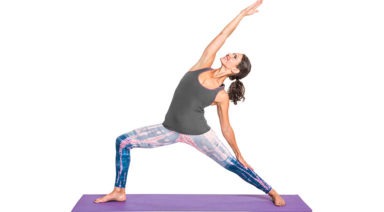
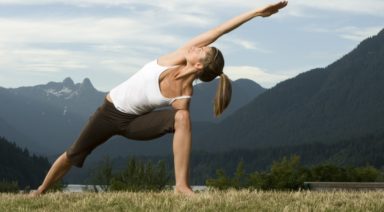
- Inhale to triangle on the left side, left toes face left, right toes facing slightly left, left arm on left leg, right arm up
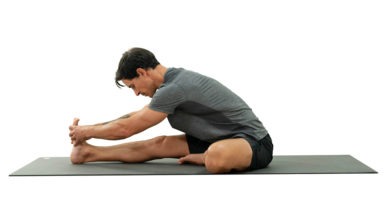
- Exhale to head over knee (pyramid pose) shortening the stance, hands to the floor
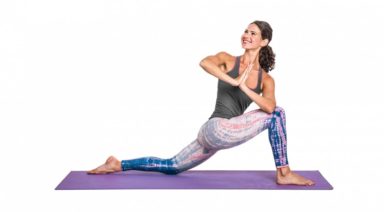
- Inhale to lunge to the left
- Exhale to forward facing lunge starting near left foot
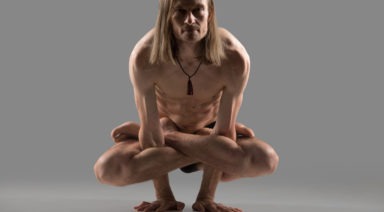
- Inhale squat through center
- Exhale to forward facing lunge near right foot
- Inhale to lunge to the right
- Exhale to head over knee, hands to the floor
- Inhale to triangle pose on the right
- Exhale to star
- Inhale to goddess
- Exhale c-curve to the right
- Inhale to mountain
- Repeat in the evening, on new and full moons to connect with your feminine side and to compliment sun salutations
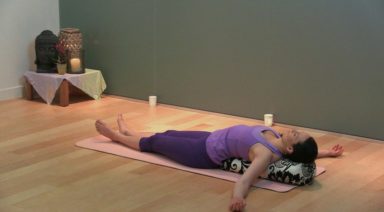
We All Need Savasana
Regardless of where you are on a personal healing journey, you need rest. That is why you should practice savasana. Savasana may be used to relax, let go and surrender. There are many ways you can do savasana. Try out a few approaches to find what works best for you. You can simply lay flat on the floor on your back, palms up, legs relaxed. You may cover yourself in blankets, or place a heavy blanket folded over the hips and belly, for a more secure feeling. You may choose to prop your legs with bolsters, or legs up the wall, or on a chair.
If you are pregnant, you may lay on your side with bolsters or blankets between the legs. Pregnant or not, you may enjoy propping a bolster up on blocks so it lies like a reclining chair. Then do reclined bound angle, propping your back up and head on the bolster, placing your bum on the floor, souls of feet touching, thighs supported by blocks or blankets.
Regardless of how you lay down in savasana, settle in, and then do nothing. Do not shape your body, mind, or breath. The healing process requires you to give into the forces around you. Be held to earth by gravity in stillness, in inaction. Allow your body, mind, and spirit to just be: a tremendously powerful healing force. Accept how your experience unfolds and call on gratitude to close.
Try out the practices that suit you as you grow, heal, and evolve. I bow to your return from pain to presence. Namaste.
About the Author

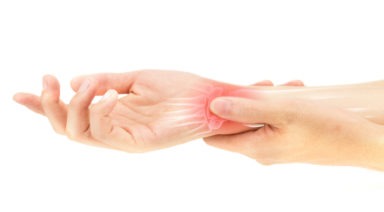
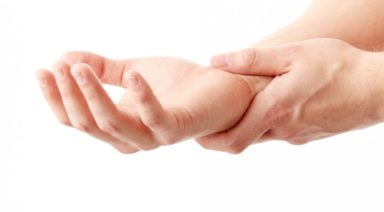
How to Avoid Wrist Compression in Yoga

Most of us don’t give much thought to our wrists – until they start aching, that is. If your job keeps you tied to a keyboard all day, you might experience repetitive stress injuries to your wrists. Labor-intensive jobs can also result in wrist compression and discomfort, especially if you’re carrying heavy objects. To stay on the mat and keep the pain away, use these tips for healthier, more stable wrist joints.
Tips to avoid compression
- When you do weight-bearing yoga poses, keep your wrists as far apart as your shoulders. You’ll create a straight line that allows all of your muscles and joints to support one another. You’ll find it easier to make controlled movements without relying on your wrist or shoulder joints to pick up the slack.
- On the mat, spread your fingers and press the pads of your fingers into the material. It might feel strange at first, but you’re helping to distribute the weight and support your wrists. If you’re facing forward, your middle fingers should point ahead of you.
- You might find yourself neglecting your thumb. It’s easy to do, but your thumb can actually help you find balance and strength. Press the side of it into the mat so it stabilizes your wrist during weight-bearing poses. Again, you might feel awkward at first, but practice will make this technique second nature.
- Start with simple yoga poses that allow you to focus on your body and what it’s telling you. Don’t try more advanced poses until you have the hand position down. If you’re struggling to perform the actual pose, try modified poses so you’re not putting your body through too much stress. For instance, do downward-facing dog against a wall instead of on the mat.