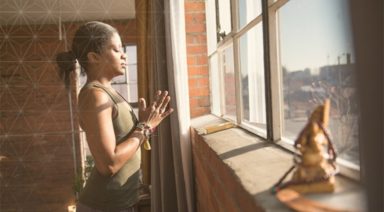
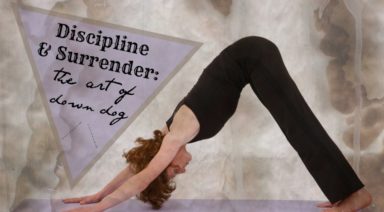
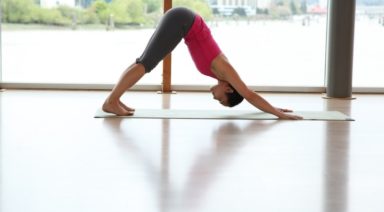
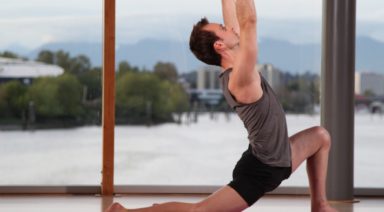
Protecting Wrists in Downward Facing Dog and Yoga Poses
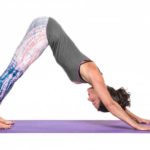
I teach Hatha Yoga classes at a variety of Yoga studios, some with carpet and some with hardwood flooring. Regardless of the flooring type, I often see common hand-placement errors in wrist-loading Yoga poses like Downward Facing Dog that can chronically lead to compression injuries in the wrists.
Having the proper placement and understanding of how to manipulate the surface area of the hands can significantly reduce the incidence of wrist injuries in your Yoga practice. The first issue to address is the floor type that we practice Yoga on. Most people find practicing on hardwood floors hard for the knees and other pressure points on the body. To create cushioning, many people practice in studios on two Yoga mats. This doubling of mats creates a similar problem to practicing with a Yoga mat on a carpet. The thickness of two mats or of a mat on carpet causes the hands to sink into the soft support. When hand positions are even slightly off-balance, body weight is shifted even more into those sinking points. The wrists are next to fall into this compression and take this uneven energy. What causes this uneven compression?
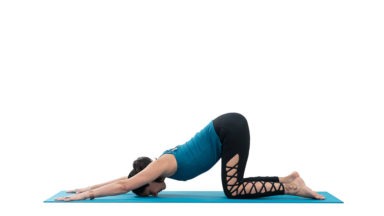
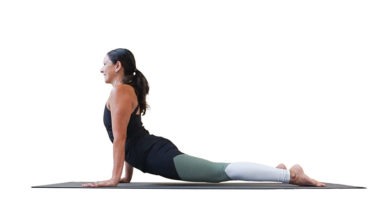
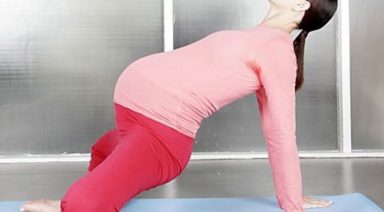
Notice what happens to the connection points in the hands the next time you do Downward Facing Dog, Cat pose, Plank pose, Cobra pose or any other pose that positions your hands forward of the shoulders and applies pressure. As you move away from your hands in Downward Facing Dog or in the exhaled phase of Cat pose, do the inner regions of the hands (proximal index finger and knuckle) lift off the ground? Is there space flowing from the inner hand into the palm?
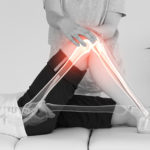
When the inner hand lifts in these loaded poses and when we practice on thick surfaces, body weight transfers heavily to the outer wrist joints. These outer joints become easily compressed and, for some, result in acute or prolonged pain. Considering how static pressure increases when we decrease the surface area that the pressure is being applied to, we can easily decrease this damaging pressure by bringing attention to how we apply energy into the hands. Before loading the hands in Yoga poses, align the wrists so the middle and index fingers roughly point forward or parallel with your mat. Send a gentle spread across the fingers without tension going into the wrists and arms. Allow a pause to lightly ground the proximal end of the index fingers and the index knuckles. Feel that you are already distributing your body forward out of the wrists and more evenly over the hands. Rather than the weight going into a small portion of the hands (high pressure), the weight is fanned out over a greater area (less pressure). As you set up the rest of the pose, keep applying this gentle, inner grounding of the index region. You may feel as though you are slightly spiraling the forearm inwards.
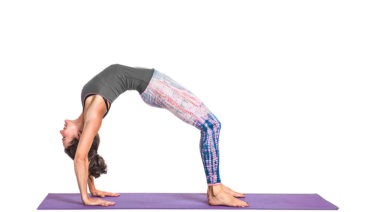
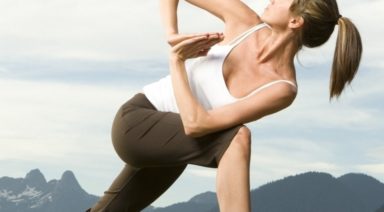
In Downward Facing Dog and Plank poses, this inwards spiral of the forearms, may draw the upper arm bones and shoulder blades forward. Therefore, a countering motion is required. A slight outwards spiral of the upper arms should be applied along with a light hugging of the shoulder blades back and down into the upper ribs. There are various Yoga equipment products that can aid in reducing wrist compression as well. But I first recommend exploring how you can change hand placement and energy applications. If possible, practice with only one mat and thinner cushioning under the hands.
Be more aware of the surfaces you practice on and add additional care to protecting the wrists in loading Yoga poses. As our practice is life-long, we need to perform Yoga poses mindfully to sustain the vitality of joints.
About the Author
3 Exercises to Strengthen Your Hips and Balance Your Body

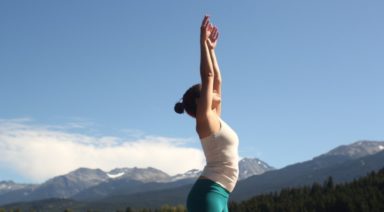
In yoga we often speak of tight hips, needing to open the hips, balancing the opening of our hips from side to side (etc), but there is more to a balanced body than open hips. We also need stability and support from our hips. This is important not only in yoga but also in day-to-day activities like simply walking. It is especially important if you are an athlete and need to perform on one leg.
A Look Inside the Hip Our hip musculature is made up of many muscles, large and small. For stability, we need the muscles of the side of the hip to be active and engaged. If you place your hands on the sides of your bony pelvis below your waist, you can imagine a tear-drop-shaped area below the ridge of your pelvis. The front part of the tear is the Tensor Fasciae Latae or TFL which connects with your IT band to join at the knee. At the back part of the teardrop are the Gluteus Medius and Minimus, which lie underneath your big Gluteus Maximus.
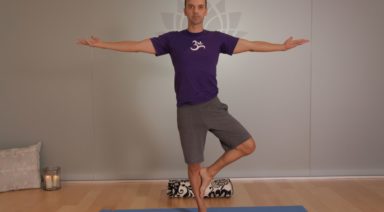
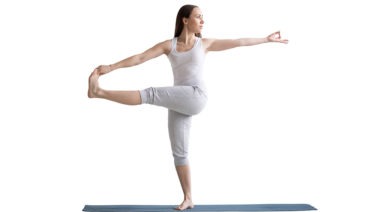
These muscles are what support and keep you steady in balance poses or when you transfer weight from one leg to the next as you walk or run. For many of us, these muscles are fast asleep, so we recruit our hip flexors at the front or our glutes and our hamstrings at the back to do a job they were not designed to do. Over time this can lead to low back pain and sacroiliac joint pain. Forcing our body to compensate will lead to problems over time. A look outside the hip Tree pose can be a simple test to see if we are accessing our side/lateral hip stabilizers.
Stand in front of the mirror and take a medium-size tree pose with your foot resting on the shin (even if you can go higher). Place your hands on your bony pelvis again and see if they are level from side to side. If not, press the shin into the foot and the foot back into the leg so that the standing hip drops to make the hips level. If this is too difficult to achieve, keep your foot off the ground but come out of tree pose so that your knee is facing forward, raised to hip level with the knee bent.
Try to level the hips again here by firmly rooting into the ground with the standing leg. My Three Favorite Lateral Hip Exercises Most of us can benefit from a little extra love and attention to the side of our hips. Try these exercises to wake up your hips and begin to stand taller on one leg
1. Kick the Ball Standing: Lift one foot off the ground. Keep your leg straight and send your heel forward, toes pointing out as if you were passing a soccer ball in slow motion. Reverse this motion by turning your toes in and sending your leg behind you. Flow forward and back, heel in and out, in a short arc. Don’t forget about your standing leg: root into the earth and don’t let the hip hitch out to the side. Repeat this motion ten times and then switch sides.
2. Clam Shell: Lie on your side with either your arm or a foam block supporting your head. Bend both hips to 90 degrees with knees bent, feet touching, stacked on top of each other. Slowly lift your top knee up towards the sky while keeping your feet together (as if you were a clamshell opening). Keep your hips stacked and avoid rotating with the pelvis. Lower, repeat times, and switch sides.
3. Bicycle: Lie on your side with both legs straight. Flex your feet, as if standing, and stack them on top of each other. Lift your top leg so that feet are hip-width apart. Keep this distance as you flow through this sequence: a) knee bent move forward to the hip at 90 degrees, b) straighten at the knee, c) float straight leg back to start. This should look like you are slowly pedaling a bike. Keep the hips stacked and stable. Strengthening our lateral hips will not only improve our yoga practice, but will also balance our body and prevent injury so that we continue to walk, vinyasa, and run for years to come.